
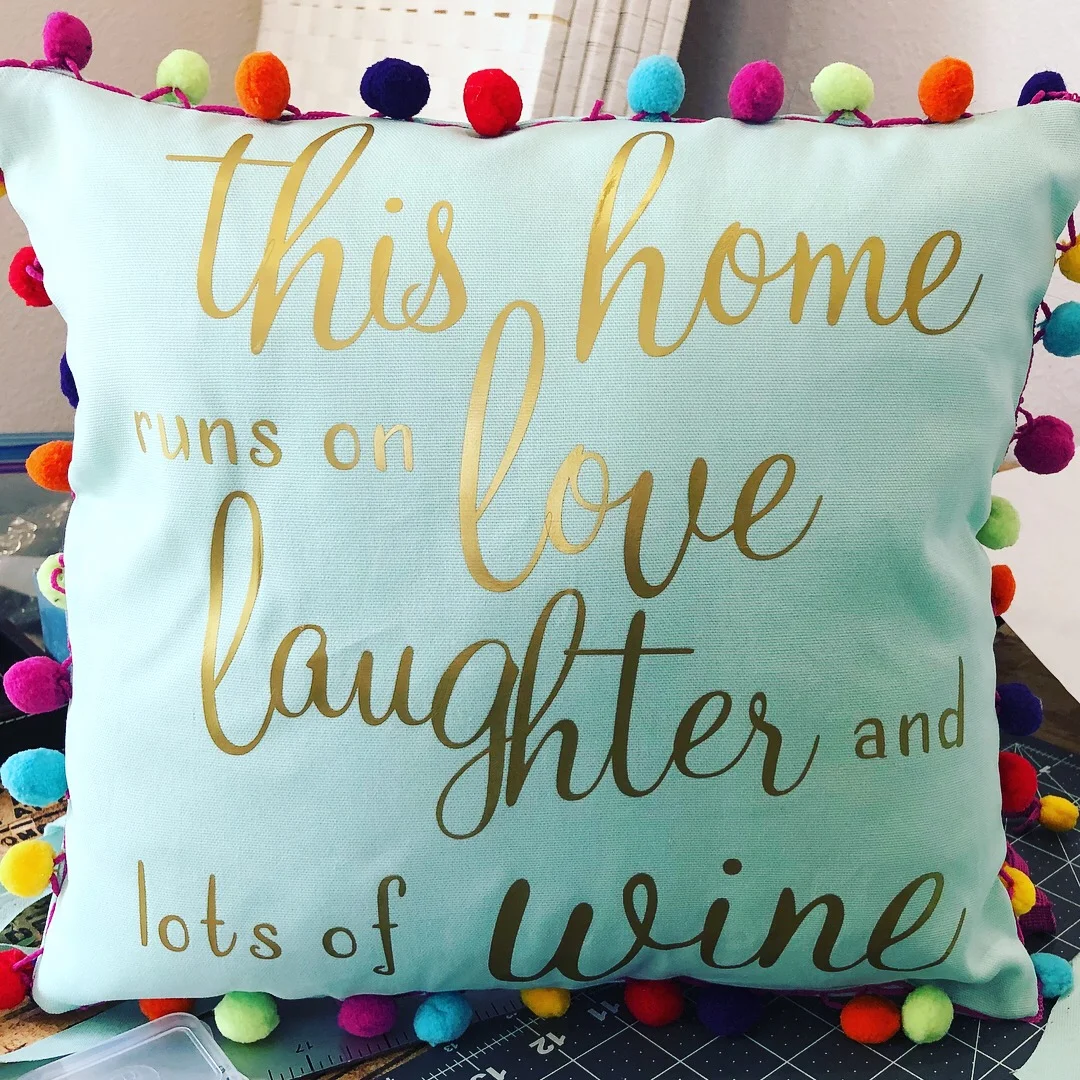
This is a simple project and with a few tricks it turns out very clean and nicely made. A good friend made a cool cricuit artwork using gold vinyl, which makes this extra awesome.
materials:
14” pillow form ($8)
1/2 Yd. canvas or duck cloth ($6)
2 yds. Trim ($6)
12”x19” roll of gold iron on vinyl ($10)

you can shop around and make the $30 project more affordable, I bet you can get it down to $15, still not as cheap as a Target pillow :( given the hour it took to make, certainly not a cost saving approach. But we’re doing it for the custom design, the coordinating look and the fun of the process.
1. Make a pattern: 15”x15” to account for 1/2” dean allowance all around. Mark the center of each side and also 1/2” in from each corner. Trim corners to zero at center mark.
2. Cut 2 of self fabric
3. Follow cricuit instructions to adhere art onto one piece

4. Pin trim all around, starting at the center of one side.

5. Sew trim down, pivoting at corners and trimming any excess amount that stretched over sewing.

6. Sew back of pillow, sandwiching in your trim.
**never start a seam on an edge, start 2” from a corner, then pivot. Sew all around and end 2” in from the opposite corner you started from, leaving a 10” opening.
Pivotting: to get store made, sharp corners. Sew to a corner, manually lower the needle down then lift the pressor foot and turn your project. When you start sewing again, you’ll have a perfect corner.


good corner!!
7. Next, clip those corners so it flips over nicely.

8. Flip pillow cover right side out and use an awl to get those corners out (details) then press from the back so nothing happens with the vinyl.

9. Shove that pillow in there! Sewing requires some muscles!! This is why back stitching is so important, so you don’t pull open the seam.
**Leaving the opening on the bottom is the best way to hide your final top stitch

10. Sew closes the opening by machine or hand.

11. Seek approval of night color-loving, recently woken up from a nap kid!

